汇智动力-接口测试心得
发布日期:2019-05-16 16:07:28 来源:汇智动力
一、背景
最近负责的项目接口签名规则做了调整,第一次接触“2次认证“的方式,正好有时间,记录一下。
测试的服务A有一部分接口需要给第三方调用,这样需要对第三方有个认证,认证是由一个公共服务(API鉴权服务)来完成的。
基本框架:
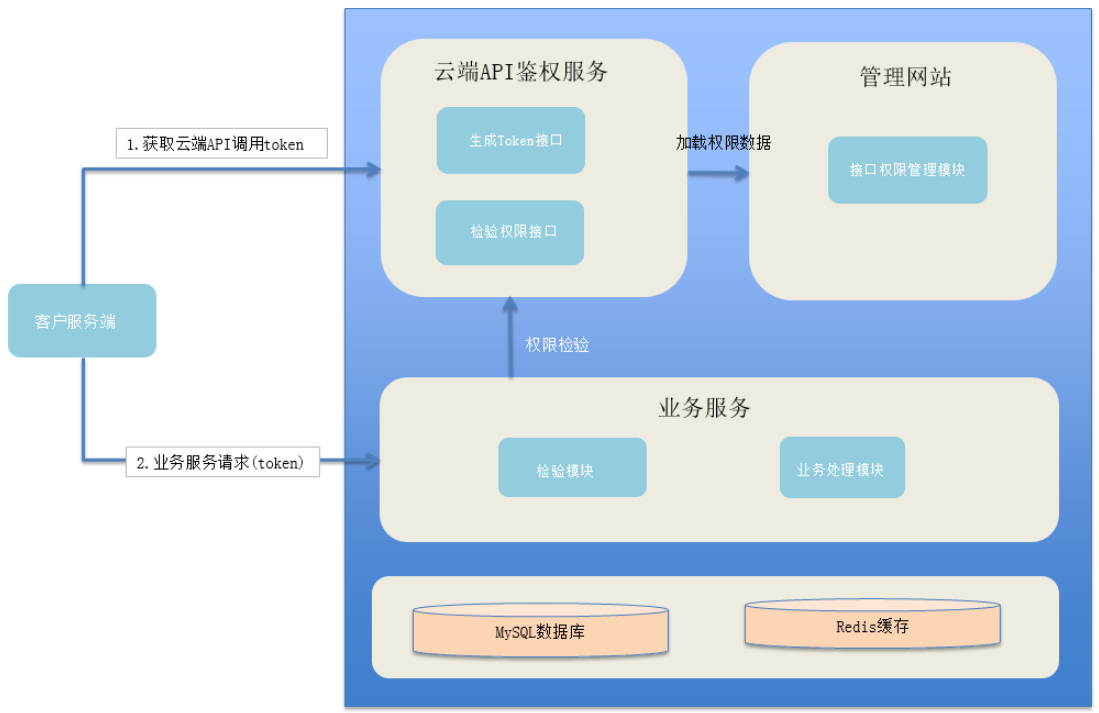
调用时序图:
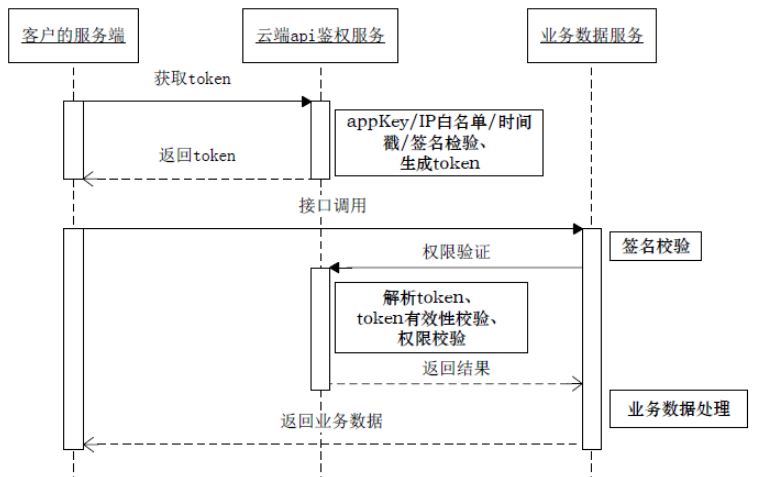
第三方调用服务A的认证流程:
1、先访问API鉴权服务来获取apiToken(即拿到访问服务A的认证)
2、再由获取到的apiToken参与服务A的签名认证规则
这样就相当于在第三方和服务A直接增加了2次认证,安全性有了更好的保障。
流程1(获取apiToken)的签名规则如下:
1、将所有请求参数的值放入List中,注意:计算sign时所有参数不应进行URLEncode;

2、将格式化后的参数以字典序升序排列,拼接在一起,注意字典序中大写字母在前,空值(null)使用空字符串代替;

3、将B形成字符串获取SHA1摘要,形成一个40位的十六进制(字母大写)字符串,即为本次请求signature(签名)的值;
流程2(获取服务A的签名)的规则如下:

1、参与签名的参数为:apiToken+appKey+appSecret+timestamp+body(提取body中的所有参数)

2、将格式化后的参数以字典序升序排列,拼接在一起

3、将第二步形成字符串获取SHA1摘要

4、第三步获得的字符串即为签名参数
二、代码实现
规则同时也是签名的构造方法,按照上面所列的步骤用Python来实现。
获取apiToken:
请求参数有3个:
appKey:应用KEY(必填项)
timestamp: 访问时间戳(必填项),Unix时间戳;
signature:签名(必填项)
 1 """
 2 Created on 2019年04月03日
 3 @author:
 4 """
 5
 6 import time
 7 import hashlib
 8 import requests
 9 import operator
10 import json
11
12 appKey = "n3nuk67byade3c3qgrccjhosvmqfzt7z5wavp3ig"
13
14 appSecret = "b3a3056ef7ffb441332892ed76998b2e"
15
16 time_stamp = str(int(time.time()))
17
18 url = "http://10.10.10.100:8080/rest/v1/token/get"
19
20
21 class get_tokenclass():
22
23     # 生成字符串
24     def str_create(self):
25         if operator.lt(appKey[0], appSecret[0]) == bool(1):           #py3中operator类和py2中cmp()函数的作用相似,通过比较2个值的大小,返回布尔类型
26             strnew = time_stamp + appKey + appSecret
27         else:
28             strnew = time_stamp + appSecret + appKey
29         print(strnew)
30         return strnew
31
32
33     # 生成signature
34     def signature_create(self):
35         str_switch = self.str_create()
36         signature = hashlib.sha1(str_switch.encode('utf-8')).hexdigest().upper().strip()
37         print(signature)
38         return signature
39
40
41     # 生成token
42     def token_creat(self):
43         signature = self.signature_create()
44         params = {"appKey":appKey, "timestamp":time_stamp, "signature":signature}
45         res = requests.get(url=url,params=params)
46         print(res.url)
47         print(json.loads(res.content.decode('utf-8')))
48         token = json.loads(res.content.decode('utf-8'))['result']['token']           #字节型的response转换成字符串型,再转换成字典型
49         print(token)
50         return token
51
52
53 if __name__ == '__main__':
54     tc = get_tokenclass()
55     # str_create()
56     # signature_create()
57     tc.token_creat()
58     # tc.str_create()
59     # tc.signature_create()
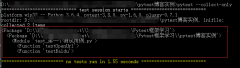
测试用例:
测试用例用unittest框架来组织
 1 """
 2 Created on 2019年04月03日
 3 @author:
 4 """
 5
 6 import requests
 7 import unittest
 8 import get_token
 9 from get_token import get_tokenclass
10 import json
11 import re
12 import hashlib
13 import random
14
15
16 class Test(unittest.TestCase):
17
18     def setUp(self):
19         token_class = get_tokenclass()
20         self.apiToken = token_class.token_creat()
21         self.sign = token_class.signature_create()
22         self.timeSTAP = get_token.time_stamp
23         self.appKey = get_token.appKey
24         self.appSecret = get_token.appSecret
25         self.base_url = "http://10.10.10.100:8080"
26         self.headers = {"Content-type": "application/json", "Connection": "close"}
27         self.requestId = str(random.randint(0, 99999))       #每次请求(每个case)生成不同的随机requestId
28
29
30     def tearDown(self):
31         pass
32
33
34     # 删除酒店
35     def test_001(self):
36         params = {
37                     "header": {
38                         "appKey": self.appKey,
39                         "apiToken": self.apiToken,
40                         "requestId": self.requestId,
41                         "timestamp": self.timeSTAP,
42                         "sign": self.sign
43                     },
44                     "body": {
45                         "hotels": [
46                             "aaa",
47                             "bbb"
48                         ]
49                     }
50                 }
51         body_list1 = str(params["body"])
52         body_list2 = body_list1.replace(body_list1[25:32], "udid")
53         body_list3 = re.sub("[[]", "", body_list2)
54         body_list = re.sub("[]]", "", body_list3)
55         list_sig = self.timeSTAP + self.apiToken + self.appSecret + self.appKey + body_list
56         signature = hashlib.sha1(list_sig.encode('utf-8')).hexdigest().upper().strip()
57         params["header"]["sign"] = signature
58         res = requests.post(url=self.base_url+"/partner/hotel/remove", data=json.dumps(params), headers=self.headers)        #第二次签名验证
59         response = json.loads(res.content.decode('utf-8'))
60         self.assertEqual(response["msg"], "SUCCESS")
61
62
63 if __name__ == '__main__':
64 mySuit = unittest.TestSuite()
65 tesTCases = ["test_001", "test_002", "test_003", "test_004", "test_005", "test_006", "test_007"]
66 for cs in tesTCases:
67     mySuit.addTest(Test(cs))
68 # mySuit.addTest(Test("test_003"))
69 myRun = unittest.TextTestRunner()
70 myRun.run(mySuit)
另外,学会了一个变量名warning的处理办法,pep8编码规范,要求变量名或者函数名最好包含大小写。
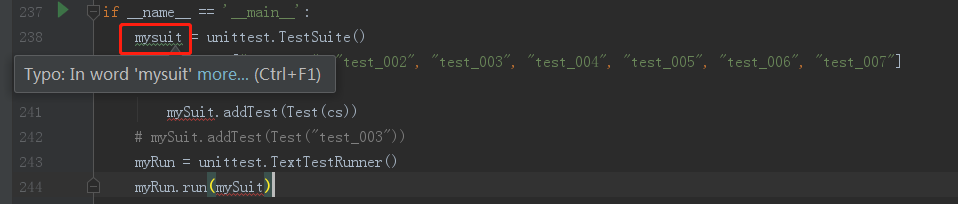
除了通过修改pycharm设置的方式,还可以使用“驼峰命名法”来给变量或函数命名。
“驼峰命名法”,顾名思义,就是变量或函数的命名要像骆驼的驼峰一样有高低起伏(Ps:这个名字是不是很可爱呢~)
另外:python的hashlib库还可以完成密码的md5加密等功能。
如:
import hashlib

password1 = hashlib.md5("123456".encode('utf-8')).hexdigest().upper().strip()
print(password1)
结果:E10ADC3949BA59ABBE56E057F20F883E